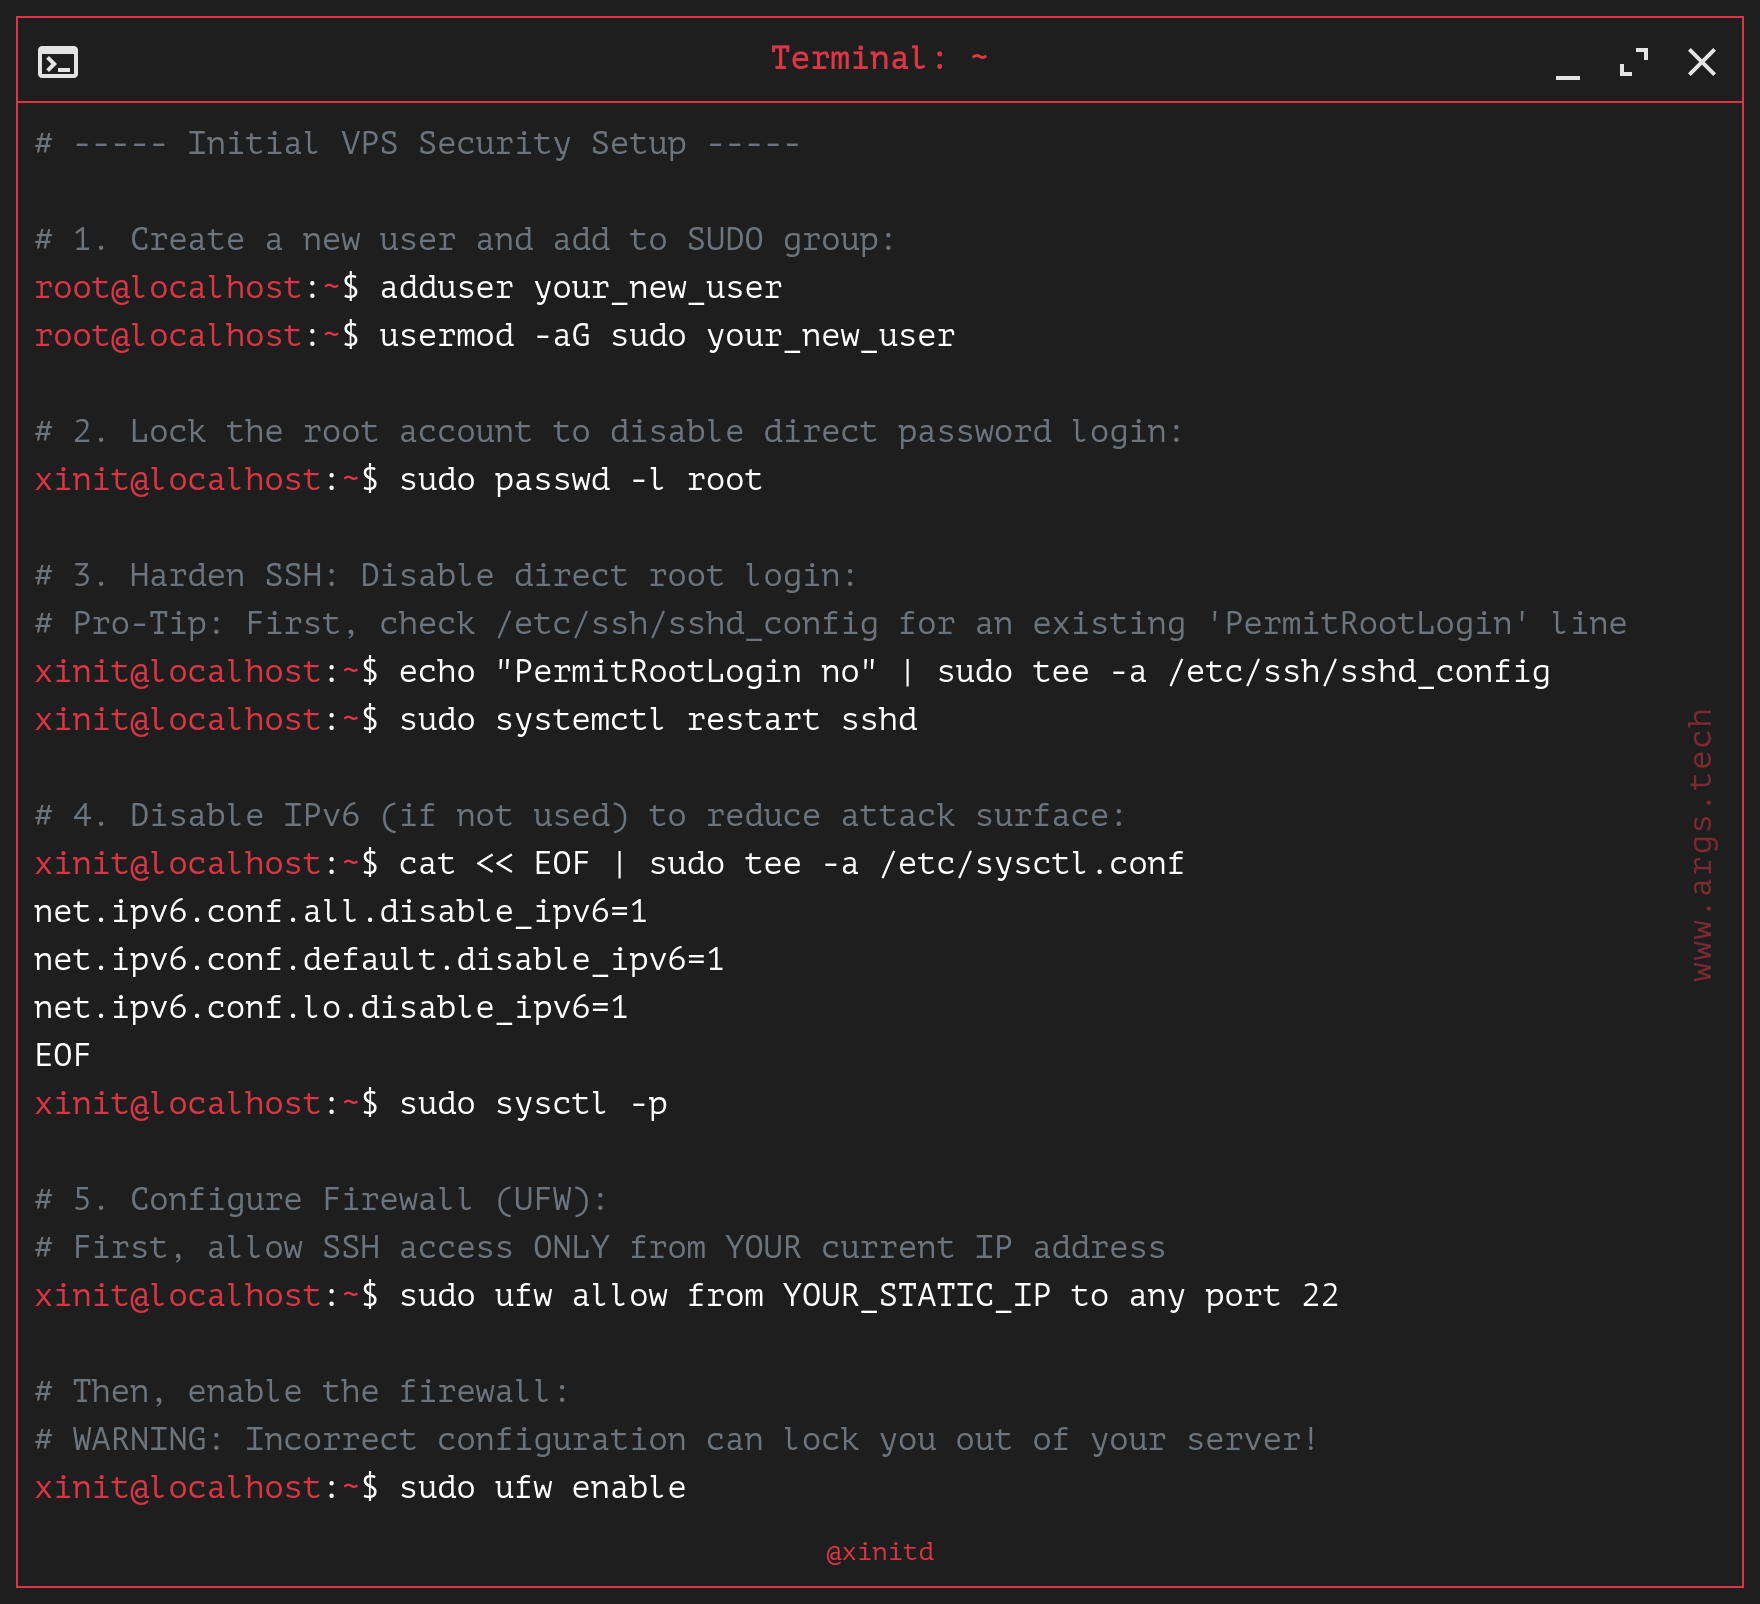
How to secure a new Linux VPS: The essential checklist
# A step-by-step guide to securing your new VPS.
# Learn how to create a sudo user, disable root login,
# and configure a UFW firewall to protect your server.
# ----- Initial VPS Security Setup -----
# 1. Create a new user and add to SUDO group:
root@localhost:~$ adduser your_new_user
root@localhost:~$ usermod -aG sudo your_new_user
# 2. Lock the root account to disable direct password login:
xinit@localhost:~$ sudo passwd -l root
# 3. Harden SSH: Disable direct root login:
# Pro-Tip: First, check /etc/ssh/sshd_config for an existing 'PermitRootLogin' line
xinit@localhost:~$ echo "PermitRootLogin no" | sudo tee -a /etc/ssh/sshd_config
xinit@localhost:~$ sudo systemctl restart sshd
# 4. Disable IPv6 (if not used) to reduce attack surface:
xinit@localhost:~$ cat << EOF | sudo tee -a /etc/sysctl.conf
net.ipv6.conf.all.disable_ipv6=1
net.ipv6.conf.default.disable_ipv6=1
net.ipv6.conf.lo.disable_ipv6=1
EOF
xinit@localhost:~$ sudo sysctl -p
# 5. Configure Firewall (UFW):
# First, allow SSH access ONLY from YOUR current IP address
xinit@localhost:~$ sudo ufw allow from YOUR_STATIC_IP to any port 22
# Then, enable the firewall:
# WARNING: Incorrect configuration can lock you out of your server!
xinit@localhost:~$ sudo ufw enable